
Hidden Dog Kennel – Custom Cabinet DIY
 As I started working on Kelsey’s bedroom makeover with her, one thing I wanted to find a solution for was the dog kennel that permanently stayed in the corner of her room. As a dog owner, I 100% understand wanting to keep your furry friends close, but also we wanted something that visually felt like more of an intentional/permanent choice. At first, we explored other dog kennels, hoping to find a stylish one to swap out. And although there are some attractive ones available, many of the designs didn’t feel like the right choice for her dog, Cooper, because of the way the structure was made and he was already used to his current kennel.
So then I started thinking on ways to hide the kennel, but making sure it was still accessible for Cooper to go in and out of as he pleased (unless Kelsey closed the kennel dog, of course). And that got me dreaming on some kind of built-in cabinet that could house the dog kennel while also feeling like part of the room.

 If you wanted the kennel to be even more “hidden,” you could add a curtain to the side where you can see it. But this could also get in the way of your dog’s access, so for this space we skipped it. Essentially, this DIY custom cabinet could hide a variety of dog kennel sizes or other things—you could customize this. We started with a kitchen cabinet base and built around it to fit the space and kennel we were working on. I’ll let Ethan explain the project more:
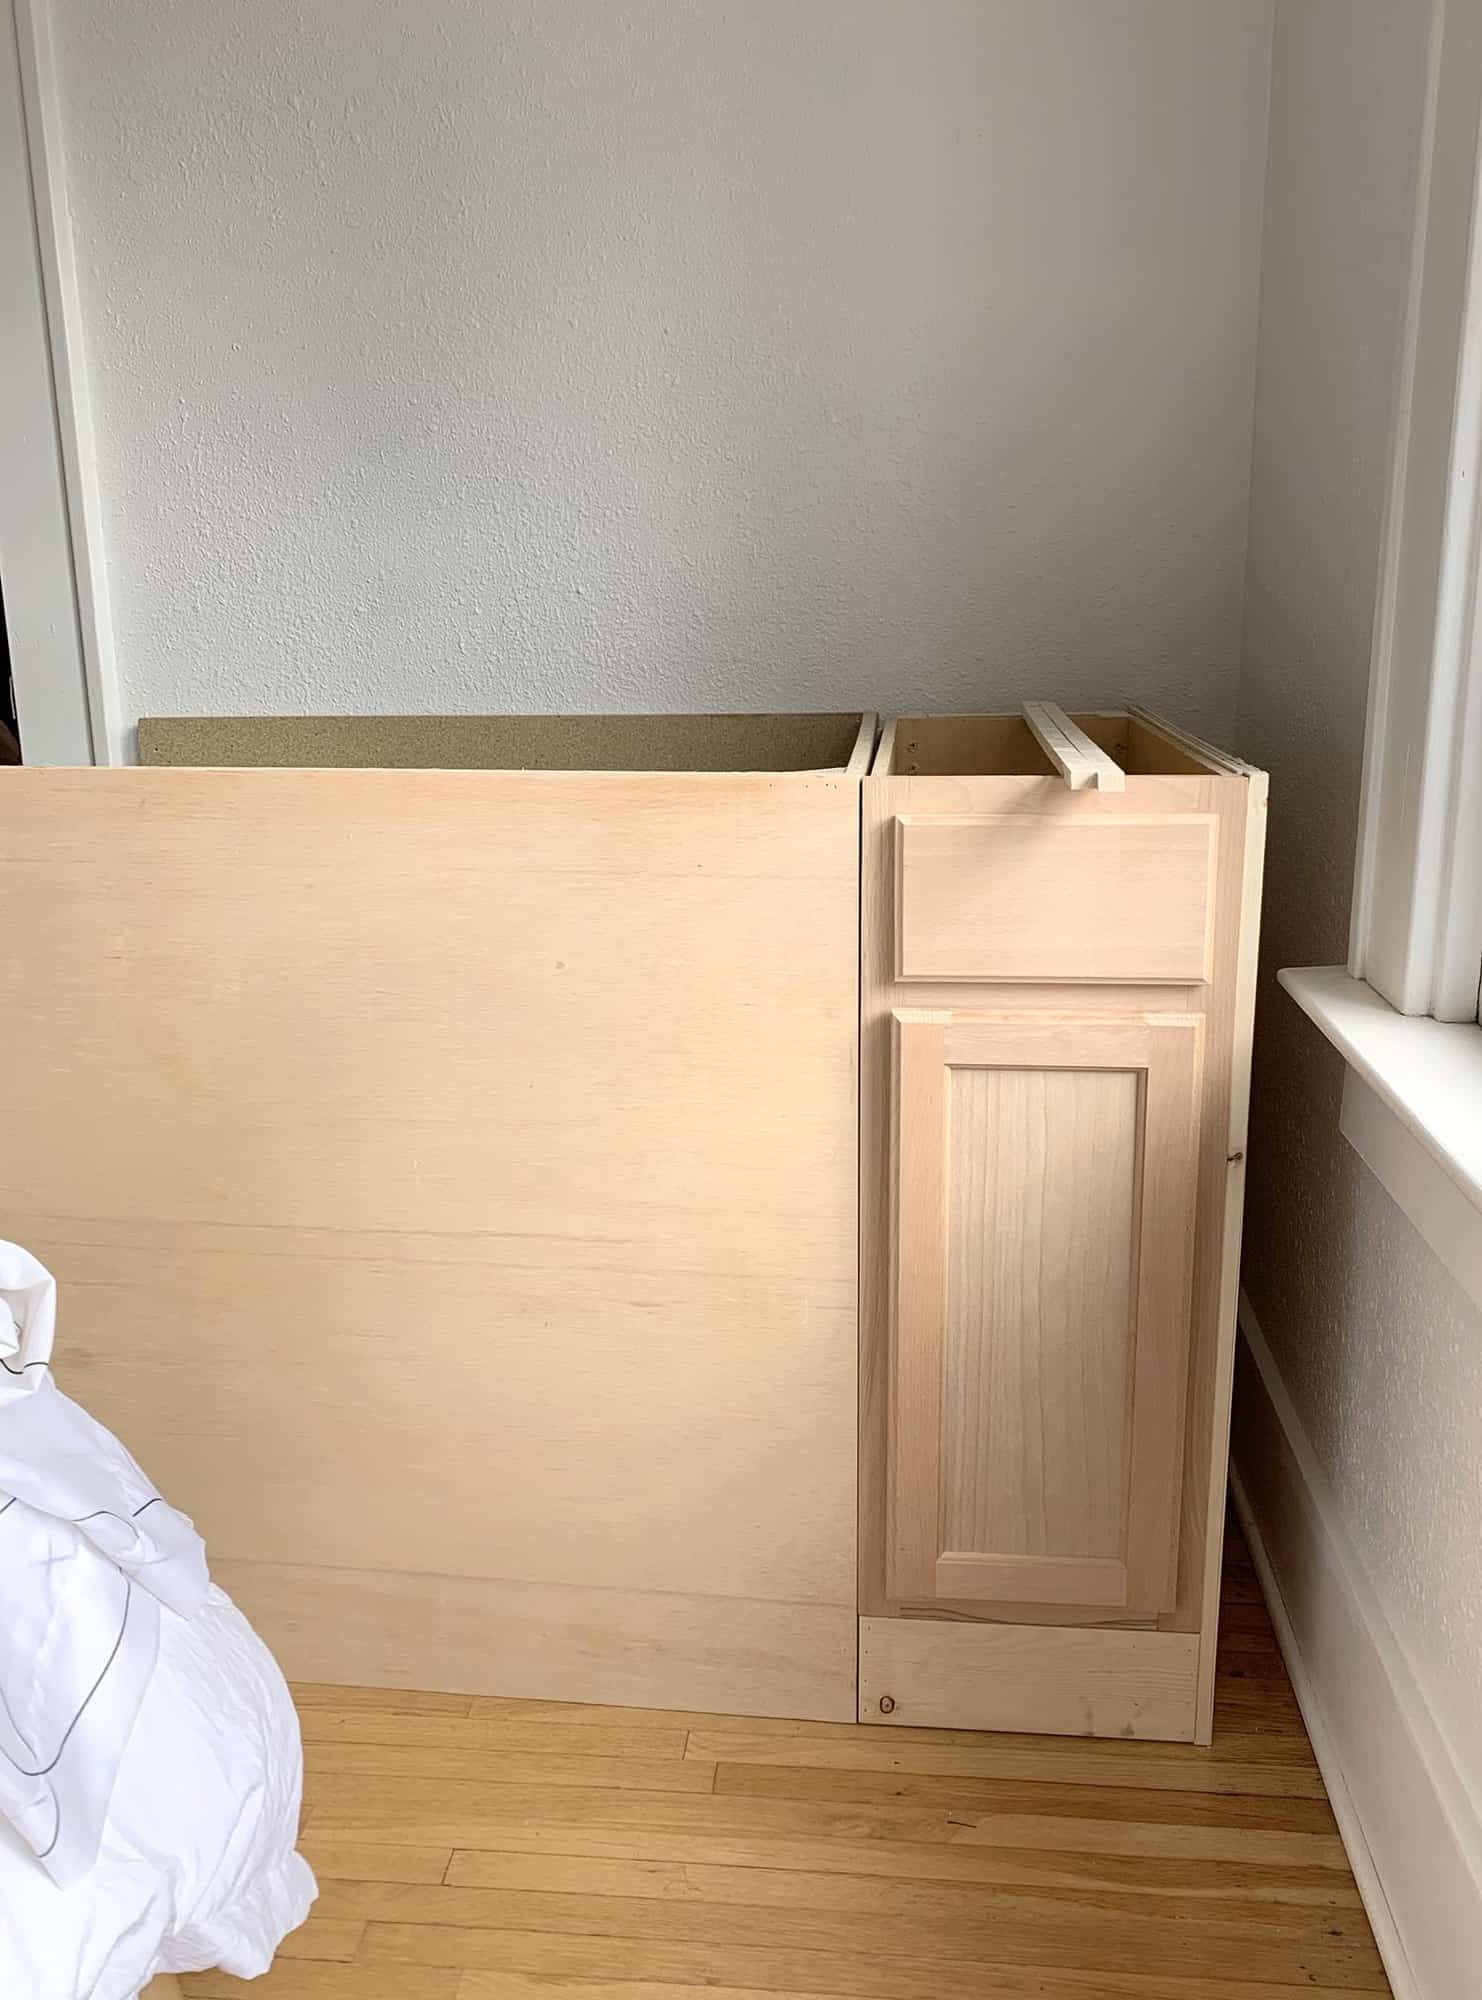
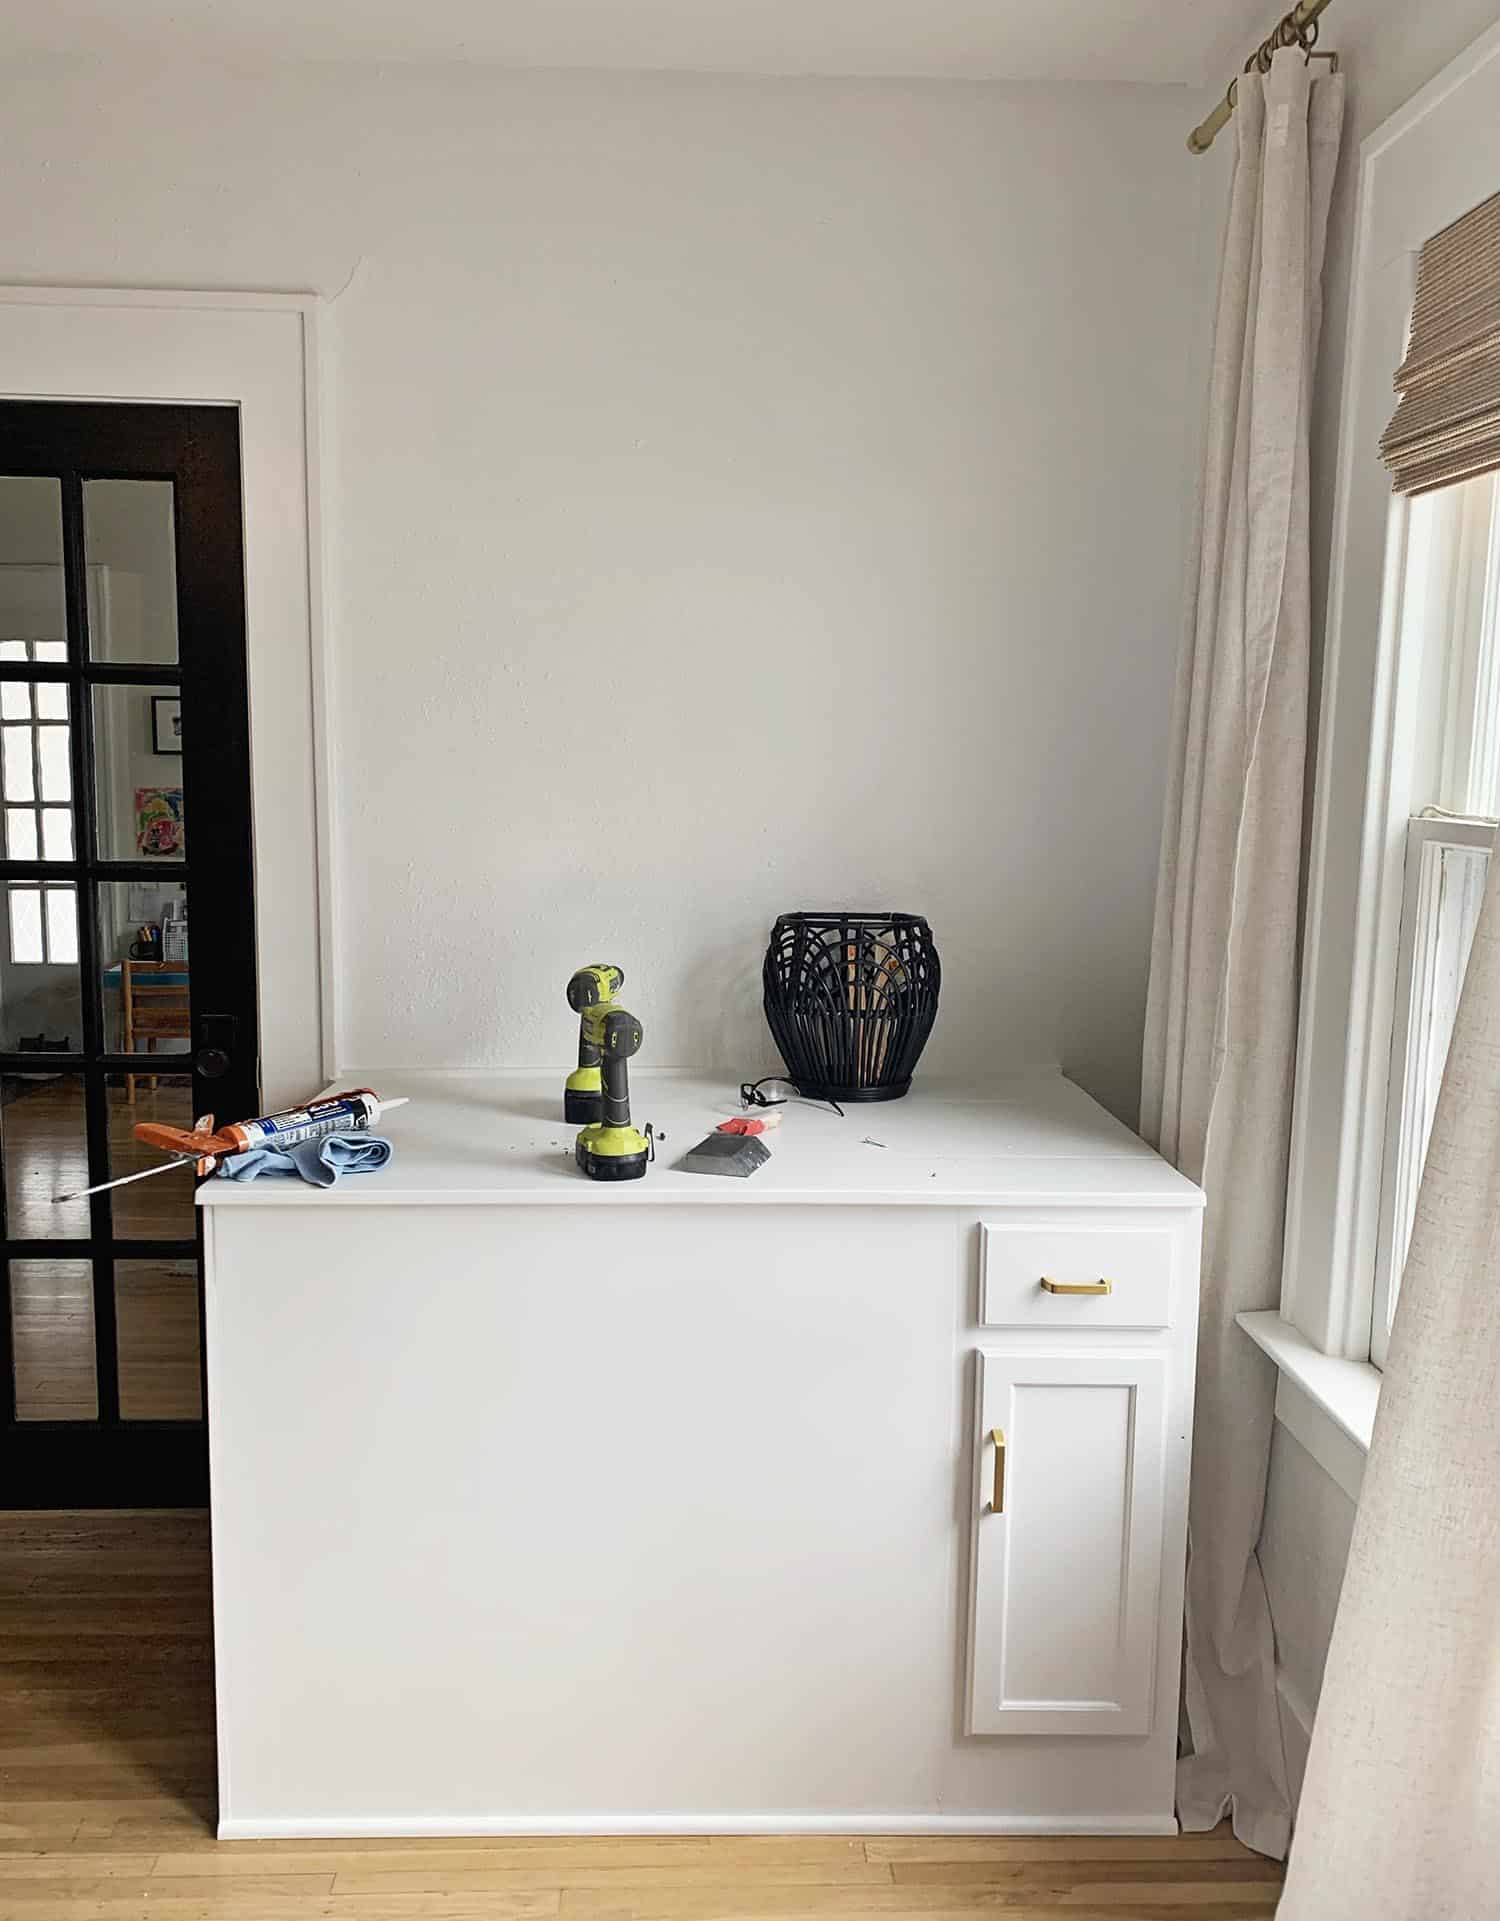
 “Thanks, Emma! So, the hardest thing with this project was figuring out the best place to start. What made it so hard was the fact that there wasn’t anything I could find that looked similar that would be a good jumping off point. Since we knew we wanted to have a drawer and storage space, Emma had the great idea to use a pre-built bathroom vanity and build from there.
Once I got the measurements for the space and the dog kennel, I picked up some 4’ by 8’ sheets of MDF and birch plywood to build the cabinet. Since we were going with a painted finish on the outside, I wanted to use the smooth birch plywood on the side you would see. I used MDF for the side that touched the wall and bathroom vanity since it does a great job at withstanding cracking and warping under stress and humidity.
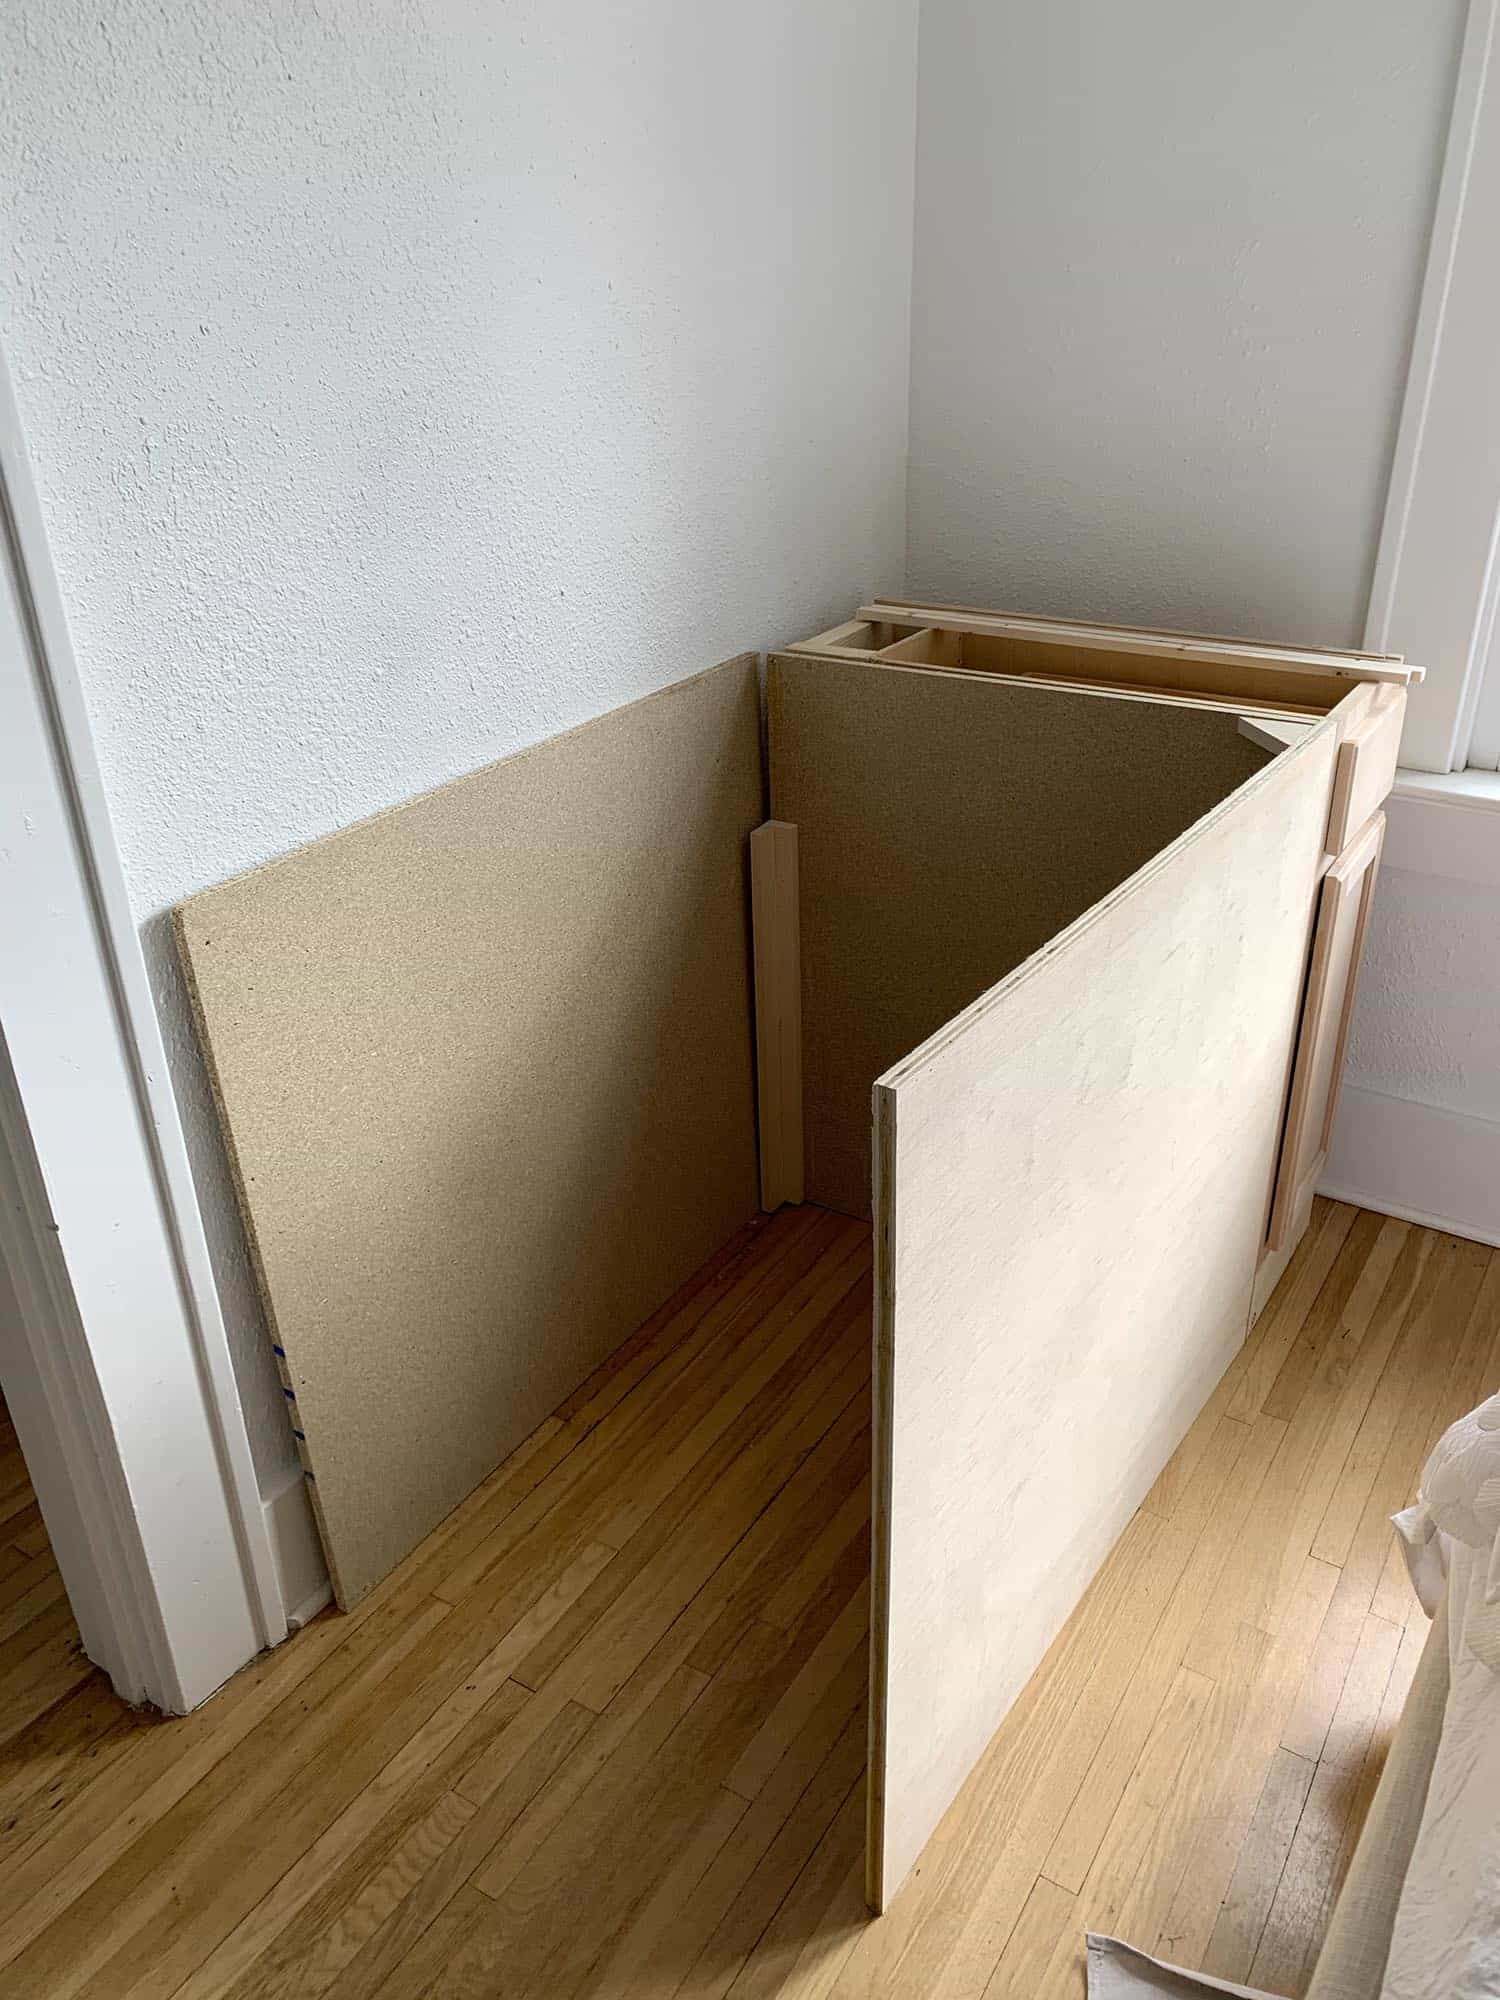
 The method for putting it together is pretty straightforward. I glued and nailed strips of 1” by 4” pine boards in a L pattern and used them as a corner supports—this was also how I fastened the sides together. Then, I cut triangles and used them as corner supports for the tops of the walls, and this also gave me a surface to nail the countertop to. The kennel we were using required the cabinet to sit far enough away from the wall that the back of the vanity was no longer flush against the wall. I didn’t want the back corner of the countertop to be floating and move when you pushed on it, so I built out a small box out of 1” by 4” to add to the top of the back of the vanity to fill in the gap and give the countertop some support.
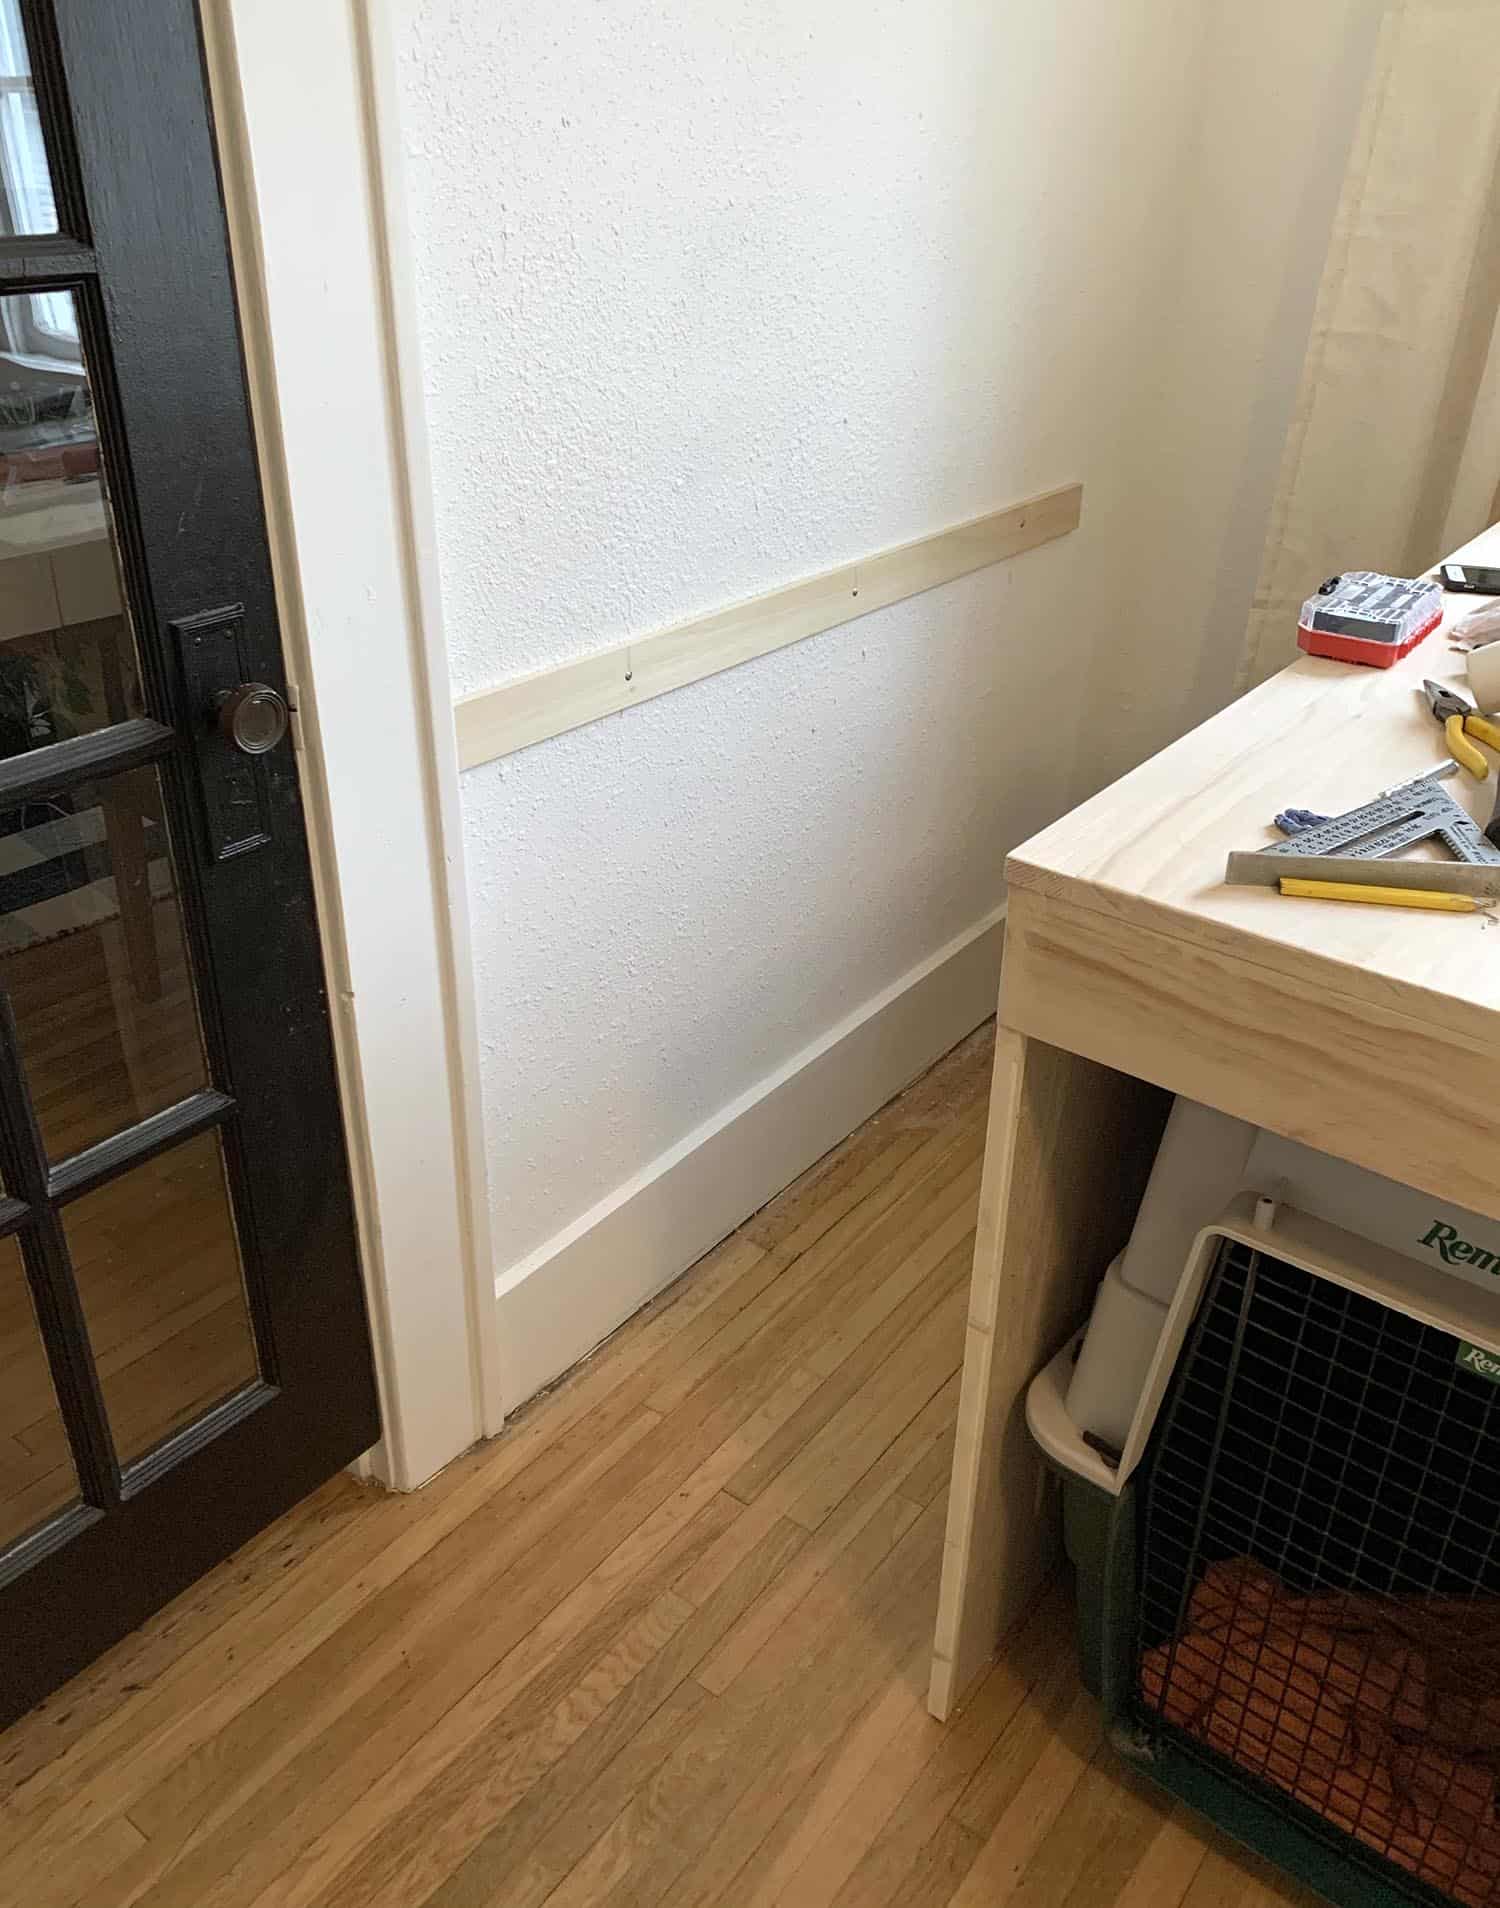
 Then, I added a trim piece to the front to make the desired opening size for the dog kennel and nailed and glued on the countertop. For the countertop material, I used number one grade pine boards (this just means a higher quality wood and less knots). Once it was all put together, I fastened a 1” by 4” ledger strip to give me something to secure the cabinet to the wall, and allow it to rest flush on the wall without having to remove the original trim. I also added a strip of quarter-round where the cabinet meets the wall to have a more seamless appearance.
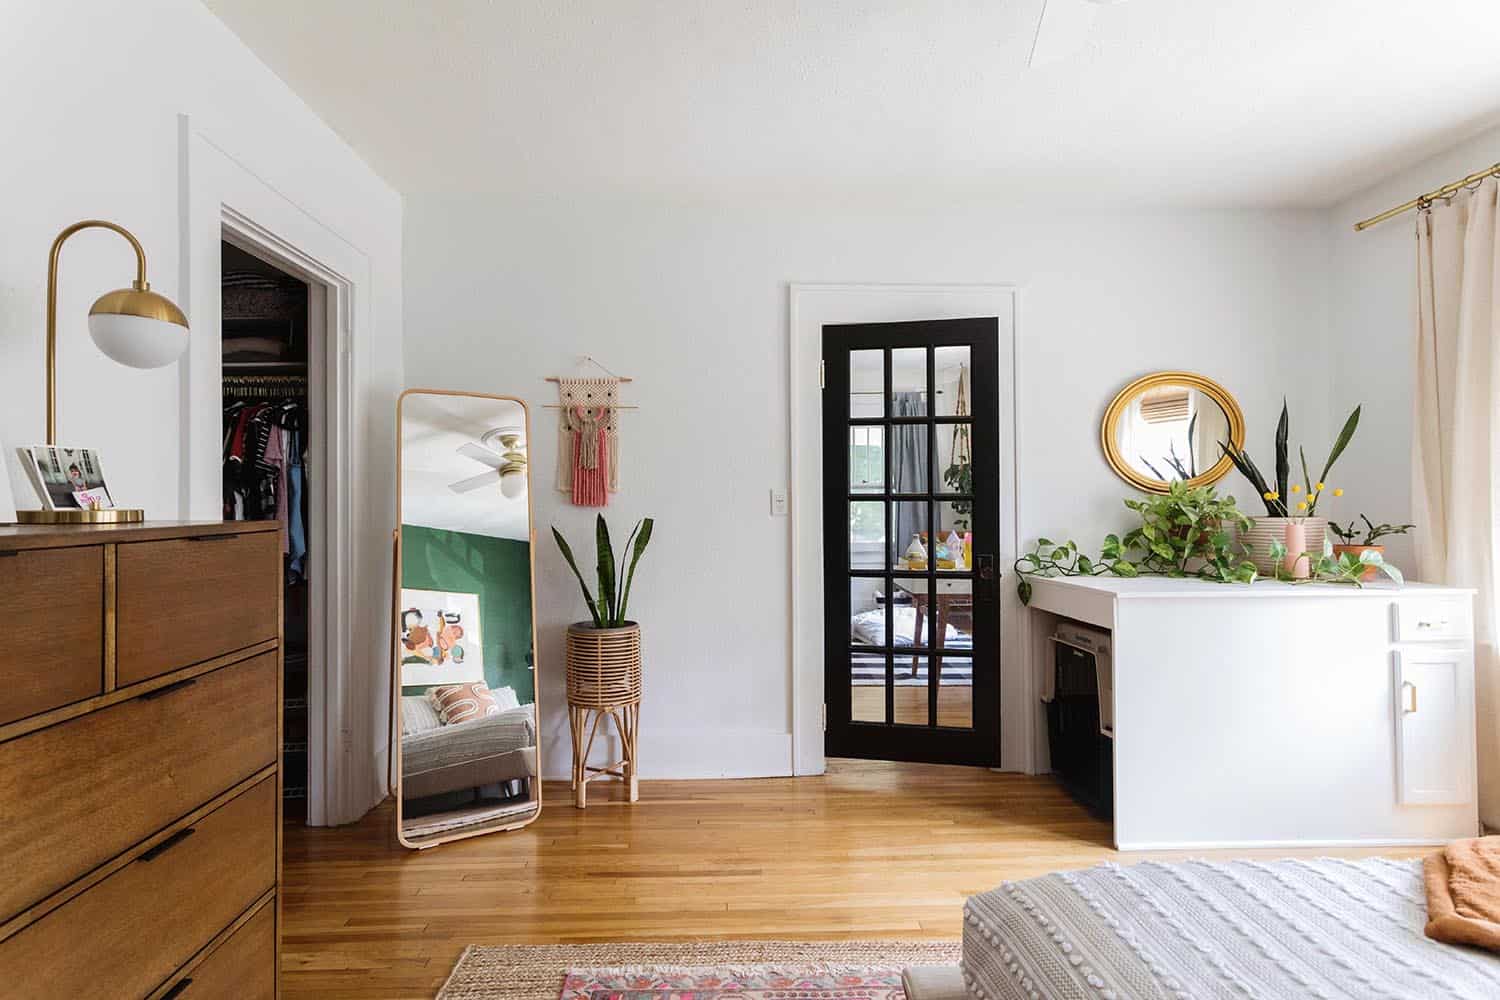
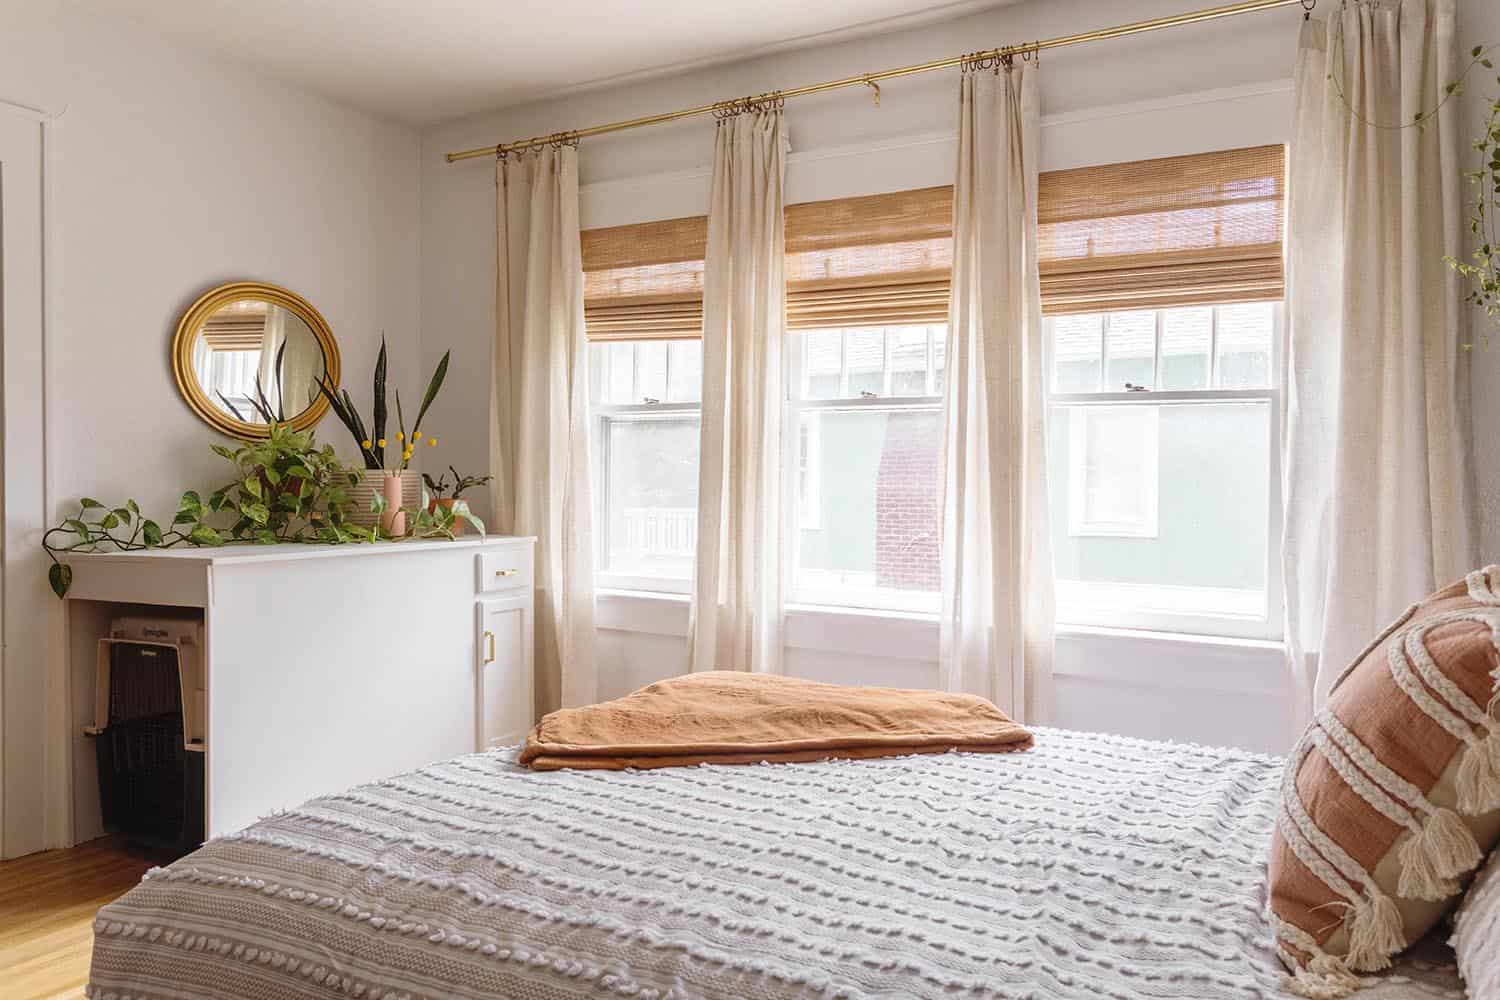 After painting and adding hardware to the drawers the cabinet was complete! Now it’s also a home to many of Kelsey’s plant babies, too. Thanks for letting us share! -Emma