
The Budget Breakdown for Our Kitchen Remodel
I'm finally getting around to posting this! I was waiting until we "finished" the kitchen, but with the possibility of us selling our house this year, we decided to forego the last two items that were lingering on our to-do list (they were: hanging new lighting over the island and getting a counter-depth fridge). We didn't think either of those items would really change how much the house is worth, and they would have added significant cost and hassle. So we decided to be done! I had a general idea of how much we spent, but I was curious if the number in my head was truly accurate. So I pulled out all my receipts and tallied up the total--both for my own reference, and for you guys, in case any of you are planning a kitchen remodel this year. I always find it helpful to read budget breakdowns. The numbers can vary wildly depending on the finishes and the size of a space, but it still gives a good idea of how much to allocate for each line item.

When I budget out a renovation project, I always start with a target number for the total. Then I make a list of everything I would like to be able to do, and the purchases (big and little) that are needed for that. For each item, I shop online and try to find the most inexpensive options that 1) fit the look I'm going for, and 2) have good reviews. I look up rough labor estimates for each task that we'd like to hire out. Then I add a 10% buffer to the total for all the miscellaneous expenses that inevitably come up. If I'm over budget, that means I have to take some things off the list, DIY more tasks, or look for even cheaper alternatives (this could mean digging on Craigslist, Facebook Marketplace, and local scratch & dent places, or it could mean simply looking for cheaper options that aren't as pretty).
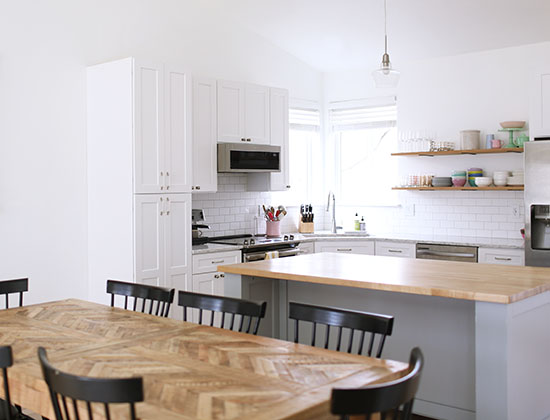
It helps me to think about my top priorities: the reasons why we're doing this remodel in the first place. We price out those items first and see what's left for the rest. For the kitchen, those priorities were knocking down the wall and replacing the cabinets and countertops. Those are some heavy hitters, so it meant a pretty bare-bones budget for everything else. We left the appliances in the same spots which kept labor costs low, we skipped any extra ideas like cutting a window on the back wall, and we chose inexpensive options wherever we could (subway tile, open shelves, etc.)
The budget we decided on was $15,000, and truthfully I was hoping to come in closer to $10,000. I've seen lots of bloggers who have done gorgeous kitchens for that amount or even less. But I think a lot of them must have painted their cabinets or remodeled a smaller kitchen...
Because even if you look for "affordable" options, cabinets are still expensiiiive. We originally tried to get some cheaper ones that would have left us more room in our budget. But when they arrived, they already had some dings and scratches...not a great sign for their durability, so we decided to return them. We were strongly considering IKEA when I found a local cabinet company that was comparable in price, and included building and installing the cabinets. I was sooo happy about this on the day of the install. He was a perfectionist and spent all day getting our cabinets exactly right. We also hired him to build an island for us: two sets of 30" drawer cabinets side by side, framed out and put on casters. All in all, the cabinets were by far our biggest expense: $6,127 for the perimeter and $2,576 for the island. The island would've been less if we didn't make it movable, but the crawlspace access is underneath it so we needed it to be able to roll out of the way (believe me, we tried to find another spot for the crawlspace access but there wasn't anything better).
One way we saved on cabinets was by choosing the in-stock colors instead of getting them custom painted. There was a blue option he had that I loved for the island, but the total would have been $1000 extra, just for a different color. So we went with the standard white for the perimeter and the standard grey for the island. The extra things we did choose are: taller upper cabinets (so they'd line up with the windows and give us more storage space), pantry pull-outs (totally worth it!!), and a trash pull-out (which is one of my favorite features in the whole kitchen, no joke).
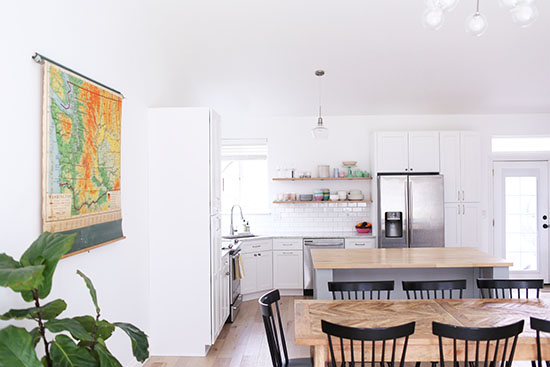
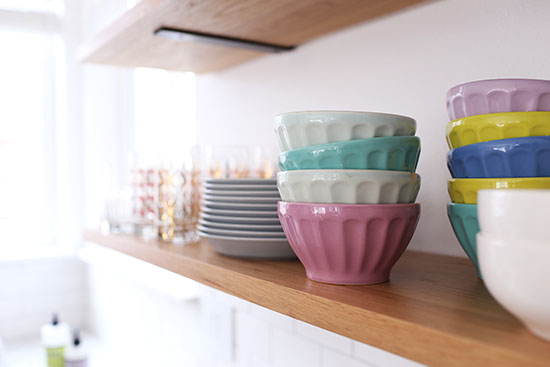
We went back and forth on doing upper cabinets or open shelves, and ended up with a mix: upper cabinets on the side of the stove, and open shelves next to the fridge. Since we lost our pantry closet and half of the upper cabinets, I was a little concerned about storage space, so I put in two pantry cabinets to make up the difference. Rather than doing them side-by-side, I put them on either end of the kitchen for a more balanced look. As it turns out, the pantry pull-outs allow us to utilize the space much more efficiently than the old pantry closet. We only use one of the pantry cabinets for food, and it actually feels like we have more space than before! The other one is used for appliances and baking dishes, which I love! It's so nice to have an organized spot to hide away things like our crockpot, toaster, rice cooker, pancake griddle, and muffin pans.
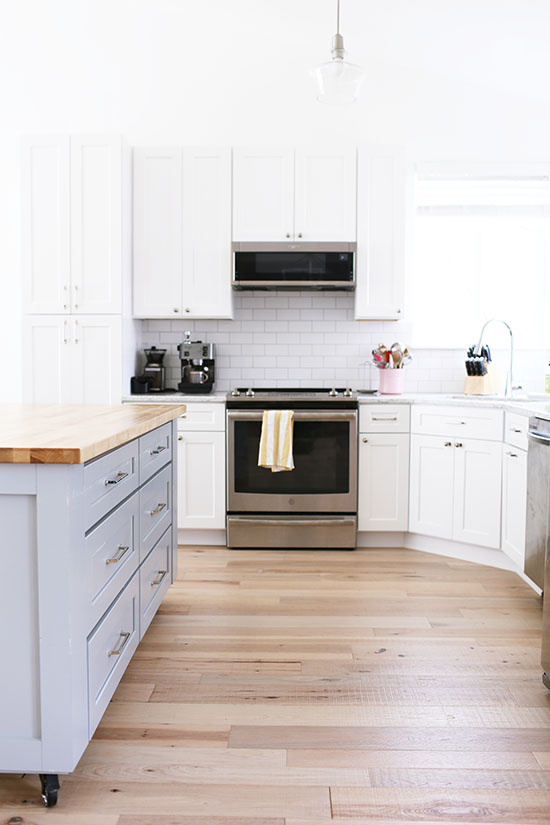
After cabinets, the next biggest line item was counters. I love the look of marble and have it in our bathrooms, but I decided to use quartz in the kitchen. I'm definitely a messy cook, so I wanted something low-maintenance! The cheapest price I found was around $1800 for a speckled light grey quartz ($58/sq ft)...but I had my heart set on something more veiny. Home Depot ended up being the best price I could find for a quartz that resembles marble (this is the LG Rococo). They were running a 20% off promo, so our counters cost a total of $2637 ($72/sq ft). That cost includes installation, which turned out great. They didn't give us any seams, yay!
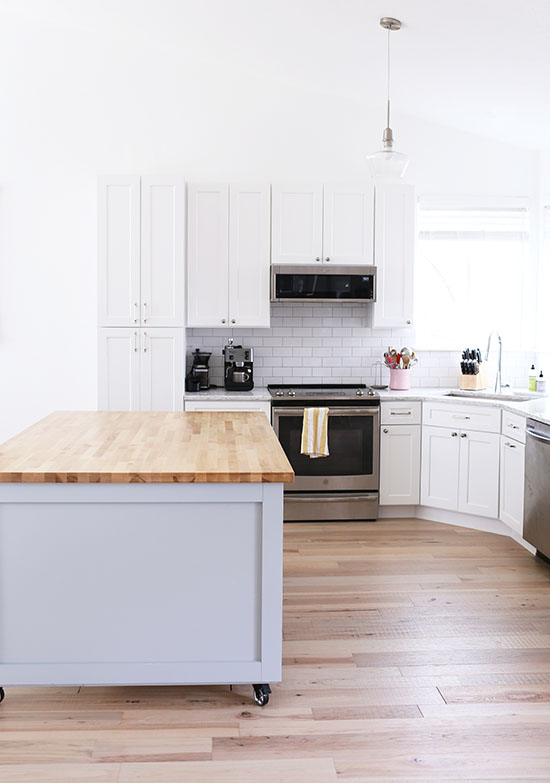
A big way we saved on counters was by only doing the quartz on the perimeter and using butcher block for the island. The butcher block was $246 for a 6' x 4' countertop (we used two of these "workbenches" glued together), whereas the quartz would have been an additional $1700 or so. I wouldn't use butcher block next to the sink, but for the island it's perfect! And I think it looks great! We sealed ours with polyurethane so we wouldn't have to worry about spills soaking into the wood.
Our third biggest expense was labor, so that's a place where you can definitely save some dollars if you're DIY-inclined. Ben actually did quite a bit himself: he demo'd the wall, repaired the drywall, painted, installed the open shelves, and more. But we decided it was worth it to hire out some of the big tasks. The two main ones were leveling out our floor (which most people wouldn't have to do) and installing the tile backsplash. In hindsight, I wish I would have tried to DIY the backsplash as the subway tile was sooo cheap. Even if I messed up and ruined some tiles, it would have been no big deal, and a kitchen backsplash is very straightforward compared to a shower. Maybe in our next kitchen, I'll try installing a tile backsplash myself. But this time, we were ready to be done, and nervous about DIYing something so visible. We spent about $2800 on labor, including those two big tasks and some random ones.
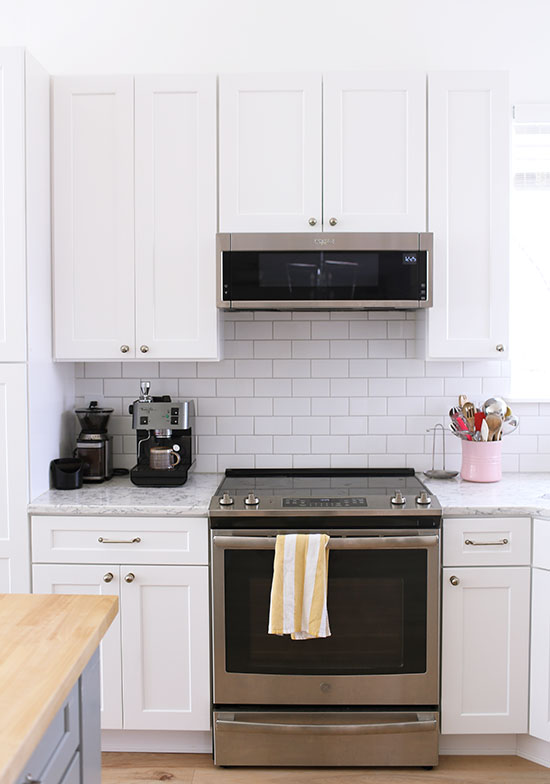
Those three items ate up nearly all of the budget already, and I haven't even touched on APPLIANCES. Originally, appliances were something we had taken off the list as we were allocating our budget. Our thought was to keep the existing appliances and upgrade them in the future, once they stopped working. But I started feeling like we really needed to get a new range and microwave along with the remodel, since they would affect where the tile backsplash started and stopped. I really wanted a low profile microwave and a range with front controls instead of a back panel. To justify the cost, I sold our old range, our old microwave, and our old cabinets on Craigslist, which gave us about $1000 extra to work with. I checked out local scratch and dent places and Craigslist, but in the end we chose ones that were on sale at Home Depot. We spent $398 on the microwave and $1098 on the range. Thennn our dishwasher stopped working so we ended up replacing that too. $378.
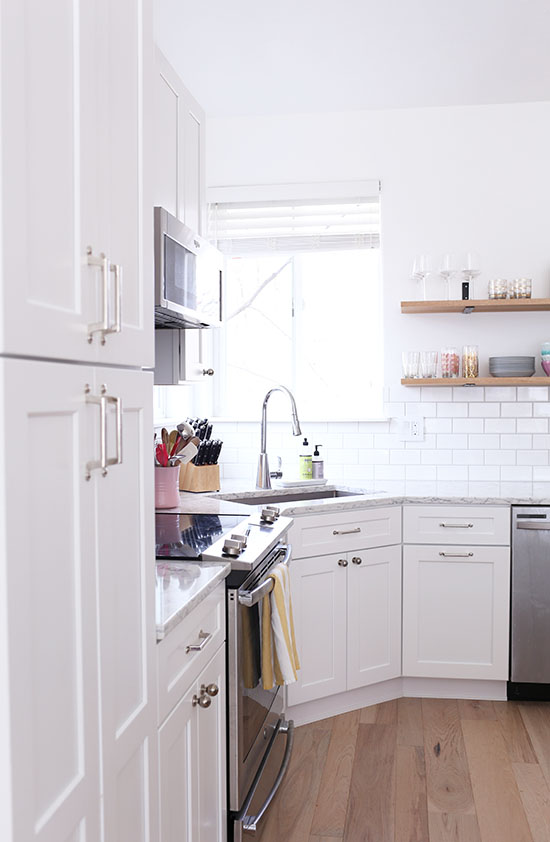
If I add up everything so far and subtract the $1000 I got from selling our old stuff on Craigslist, we're already at $15,260. So obviously, we didn't quiiite stick to our budget. But we actually got pretty close! I was able to get a few things gifted to me through blogging, which helped us a lot. We saved $1450 on the kitchen sink, kitchen faucet, and cabinet hardware, and I love the ones we got. You can read more about the sink and faucet here--as well as why we decided to do a corner sink. I've shared about the cabinet hardware on Instagram, but I should do a blog post as well because there's actually a lot more to that decision than you might think! I chose these knobs and these pulls, from an awesome Spokane-based company, The Hardware Hut.
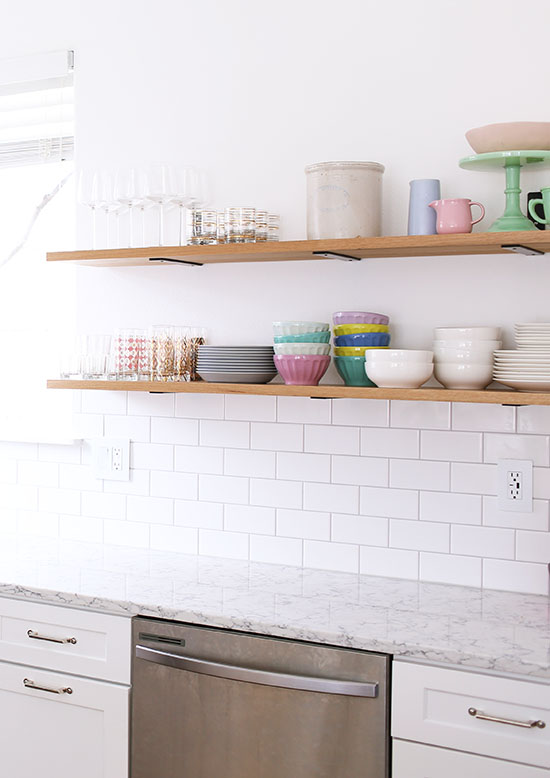
For the tile, I considered getting something more unique, but I really like classic white subway tile so why fight it? It doesn't hurt that it is ridiculously cheap at $1.20/sq ft. I'm pretty sure we spent around $50 TOTAL on the tile itself (maybe even less!).
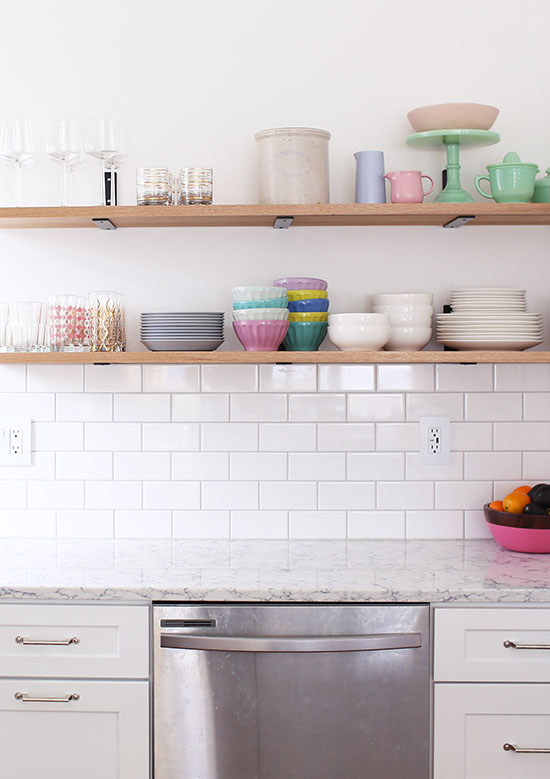
The last detail was the open shelves! I loved the look of chunky floating shelves, but I was seeing around $400 for one 5' x 1' shelf (and we needed two!). The point of doing open shelves instead of upper cabinets was to save money, so I quickly ruled that out. Then I saw this tutorial using stair treads (genius!!!). They are thicker and nicer than a standard piece of lumber, 12" deep (just right for holding dinner plates) and come in a variety of lengths and types of wood. We got two 5' long white oak treads at $53 each, plus some brackets on Amazon. The total cost was $220 for TWO shelves...much better, and I think they look perfect. Definitely a good money-saving trick.
We probably spent another $200 on random things like the garbage disposal, drywall for patching the wall, sealer for the butcher block, and so forth. It's also worth mentioning that our food spending increased during this time. We tried to cook at home as much as possible, mostly grilling and eating cold foods like chicken salad. But we did buy more prepared foods from Trader Joe's vs. making everything from scratch, we ate out more than usual, and we ordered our fair share of pizzas. I'm not going to count that as part of the actual remodel cost, but it's something to be aware of!
Long story short, we went over budget a little bit, landing at $16,730 (or $15,730 if you subtract the money I got from selling our old kitchen stuff). In hindsight, especially now that I know we might sell the house, I would probably choose the cheaper quartz counters (would have been $800 less). I also could have tried to install the tile backsplash myself (would have been $1200 less). With those two changes we could have come in under budget. But then again, $2000 isn't a huge difference with a project of this scale. I think we did ok!
Here is the breakdown of our budget, with links to all the sources:
Cabinets: $6,127
Movable island on casters: $2,576
Quartz counters: 2637
Butcher block counters: $246
Tile: $50 + $1250 for installation
Grout: already had (Fusion Pro Platinum from HD)
Range: $1098
Dishwasher: $378
Microwave: $398
Open shelves: $160
Brackets: $60
Other labor: $1550 (leveling the floors, plumbing for the sink, joining the two butcher block pieces, etc.)
Miscellaneous: $200
Minus $1000 for selling items on Craigslist
= $15,730
Plus the items we received through blogging and what they would have cost:
*Kitchen sink: $799
*Faucet: $249
*Knobs & Pulls: $405
There are obviously more important things going on in the world right now than a kitchen remodel, but I actually think that planning out projects can be a good distraction from all the negative stuff! So with that in mind, I'm still planning to write a few more posts about our kitchen...like lessons learned/regrets, and how to choose & install cabinet hardware. Is there anything else you'd be interested in?