
Tips For Partial Kitchen Makeovers - When You Can’t Remodel It All
Partial kitchen remodels seem to be really popular these days as people want contractors in and out fast and less cost on the overall job.
I’ve been looking at some kitchens lately from people who are considering some partial remodels.
I think people are focused on getting the pain points in their kitchens fixed that they’ve had a lot of time to identify, while at home. They also seem to be wanting contractors to be able to get in and get out quickly with less cost and upheaval than a big redo.
I’m going to share some of the major items I’ve been discussing with these folks, so you can consider them too for your next kitchen. :-)
1) Move the microwave
Often, the microwave is either sitting on the counter, built into an awkward cabinet that hangs out deep over the countertop, or takes up valuable cabinet real estate above a wall oven. I also recommend moving them from above the range or cooktop.
Drawer microwaves are the norm now. This is becoming a standard for this appliance in many new homes and remodeled kitchens as it saves a lot of upper cabinet depth needed for the other functions in the kitchen.
In this partial kitchen remodel, you can see in the before pic, that a microwave was built out into a deeper upper cabinet there in the right corner.

BEFORE kitchen remodel - Microwave is built into deeper upper cabinet.
We relocated it below the counter, in the butler’s pantry, for a cleaner, more open look in the kitchen. Now that range wall looks more symmetrical and makes a better visual statement.
This kitchen was basically that one item change, paint, new counters, backsplash, cabinet pulls and lighting. All other cabinetry and the floor, remained.
AFTER Kitchen Remodel - Microwave was moved below the countertop as a drawer model.
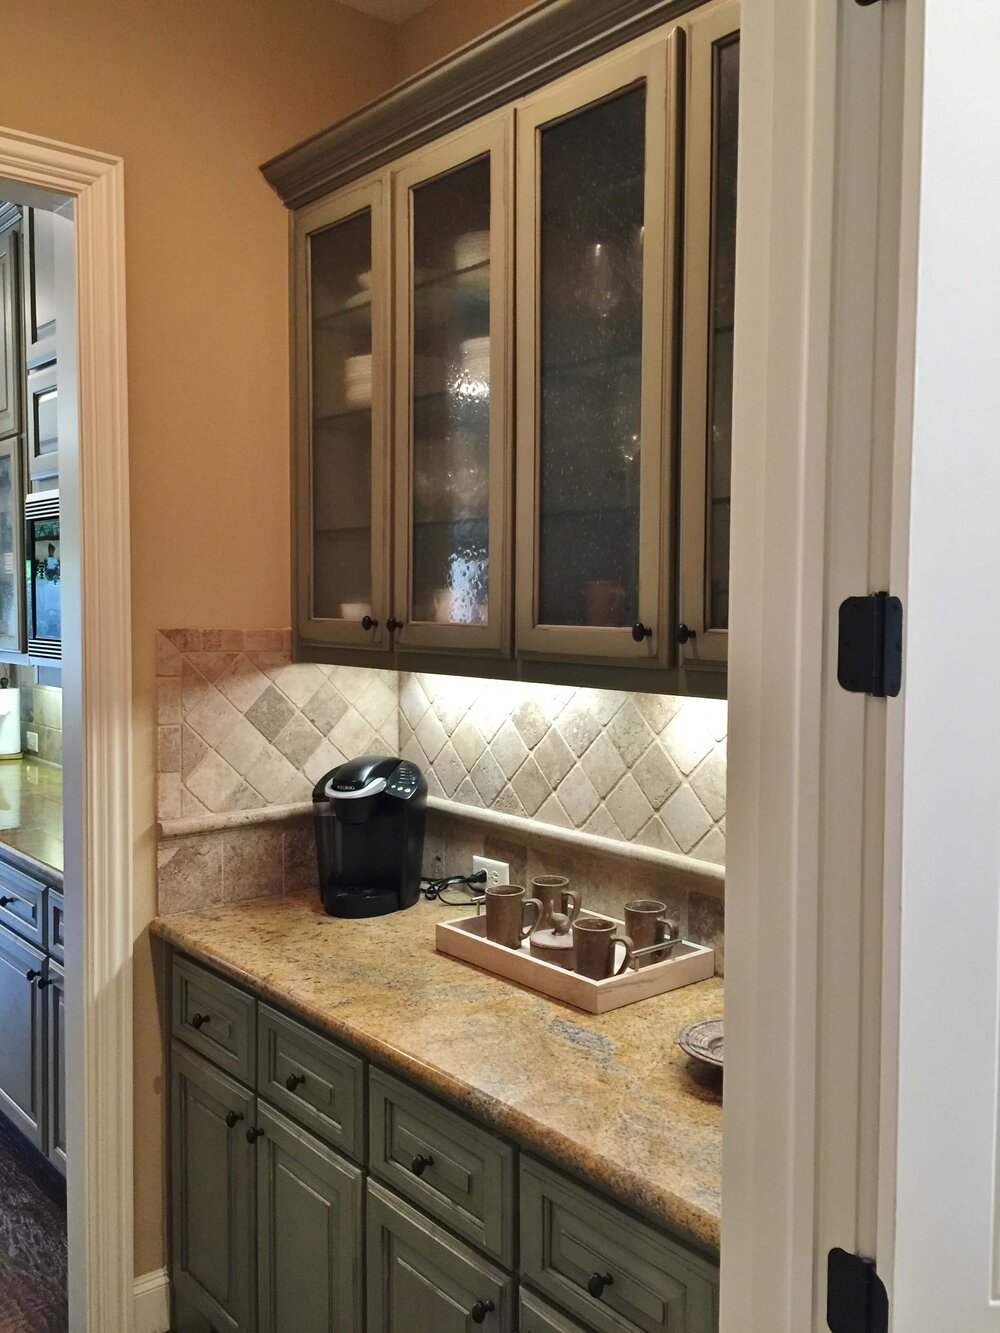
BEFORE REMODEL - Butler’s Pantry

AFTER REMODEL - Microwave drawer installed below countertop in butler’s pantry.
Here’s what I recommended in a Designed in a Click consultation on this kitchen, below. This homeowner was going to paint her cabinets and get new countertops. She had a countertop microwave on a console over in the corner of the kitchen.
I recommended relocating the microwave in the lower cabinets in the kitchen and adding some floating shelves above that piece of furniture.

This kitchen with a countertop microwave could use an update. Besides new counters and painting the cabinets, what should the homeowner do? I suggested moving the microwave.

Sketch showing moving microwave in kitchen remodel and installing floating shelves above console.
2) Minimize The Spotty Granite
So many people and designers don’t like Ubatuba granite.
I mean, I don’t love it, but really, it is not that bad if you consider it is mostly a solid black countertop look. It has a little warmth to it, but by and large you don’t read that, nor do you read any texture or spottiness to speak of.
I’ve told many a consultation client to leave the solid look granite and spend money elsewhere, to make a bigger impact.
If you just hate black countertops, that’s fine. But black granite is an inexpensive material and I’ve put the solid black look in new before, in a honed or leather finish.
At this in-person consultation, I told this client to leave her counters for now (they were a brown/black color), especially on the perimeter, and focus on other things like the paint and flooring she wanted to do. She also redid the backsplash which made a big impact.
You can see that her counters might not be totally up to date, but the mostly solid color look and the other updates she made, help minimize their age.

BEFORE - A kitchen needing an update
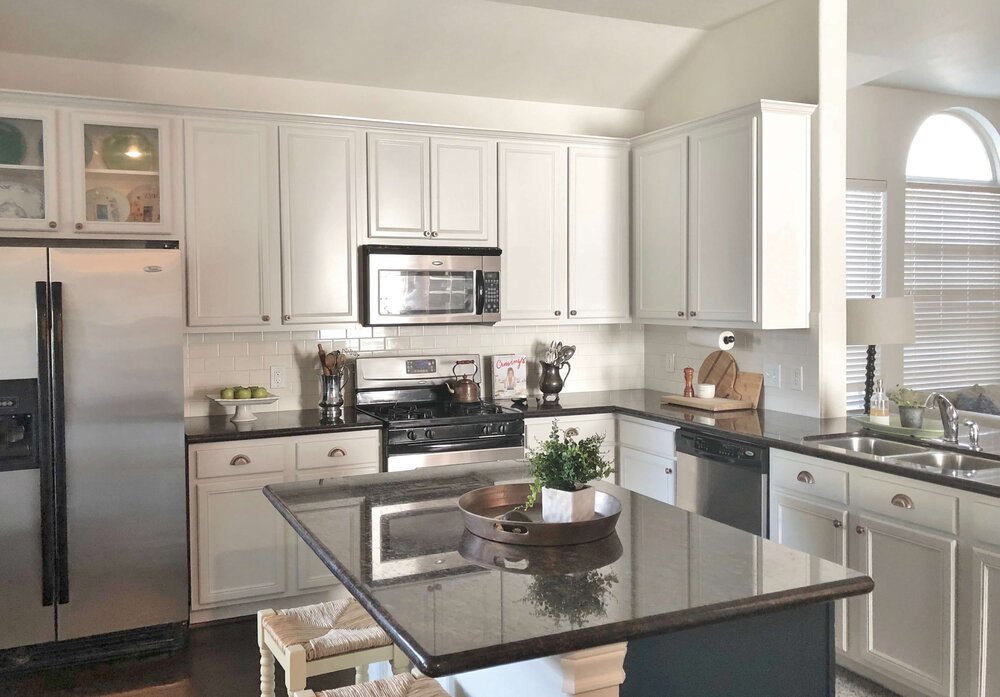
AFTER - Kitchen remodel leaving dark granite countertops and doing a new backsplash and painted cabinets.
And, by the way, we did discuss the microwave above the cooktop, but she decided to focus on other areas at this time. She can actually come back and make that modification later since her cabinets are basically boxes and that center cabinet with the microwave can be removed at any time.
She can also redo the island countertop at any time, changing it out for a light countertop material. That’s an easy fix that won’t disturb anything really and can be done in a day.
She was phasing her remodel and doing the paint, splash and flooring were her priority in this round.
A Countertop Material Change
This is the kind of countertop I make more recommendations for changing out than anything.
Spotty granite, many times it was Santa Cecelia, used often in kitchens around 15-20 years ago, is the busy material that I often urge people to change out more than anything.
Do you see food bloggers and Youtube cooks making meals on this granite now?
I do. I think since they are trying to showcase their food prep in the best way possible, a more solid look countertop would make a better backdrop. And maybe they can write it off as a business expense, right? :-)
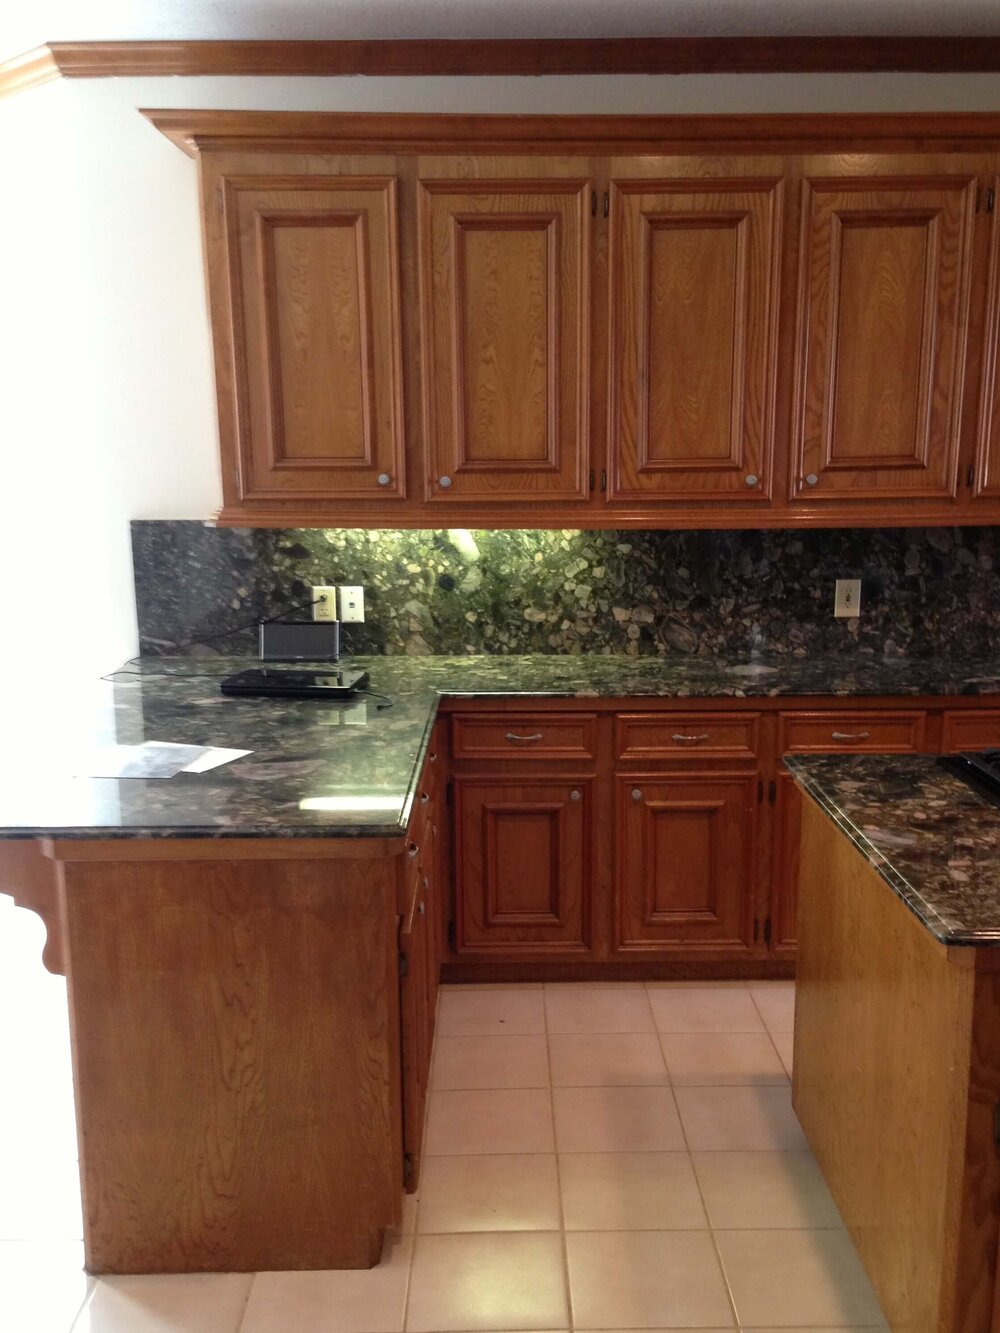
Here was a local consultation I did a few years ago. Spotty granite was everywhere, but the homeowner had just moved into this house and had lots to do all over. She couldn’t spend for all the countertops at that time.
BEFORE - This kitchen needed an update to be rid of the spotty granite. How can we do this without doing ALL of it at once?
I recommended she change out the island countertop and go with a new backsplash material, using the color of the cabinets there to help these shorter uppers look taller overall.
This minimized the spotty granite in the space and it looks sooooo much better!

AFTER REMODEL - This homeowner did a new kitchen island countertop and backsplash to give a partial update to her kitchen.
The new kitchen island countertop and new backsplash made a big difference in this kitchen’s updated look.
Here is another Designed in a Click consultation of mine, below, where the homeowner had a solid black granite on the perimeter cabinetry and a spotty granite on the island.
I recommended she change out the island countertop for a quartz marble look product. With that and the pendant lighting change, it looks like she has a brand new kitchen!
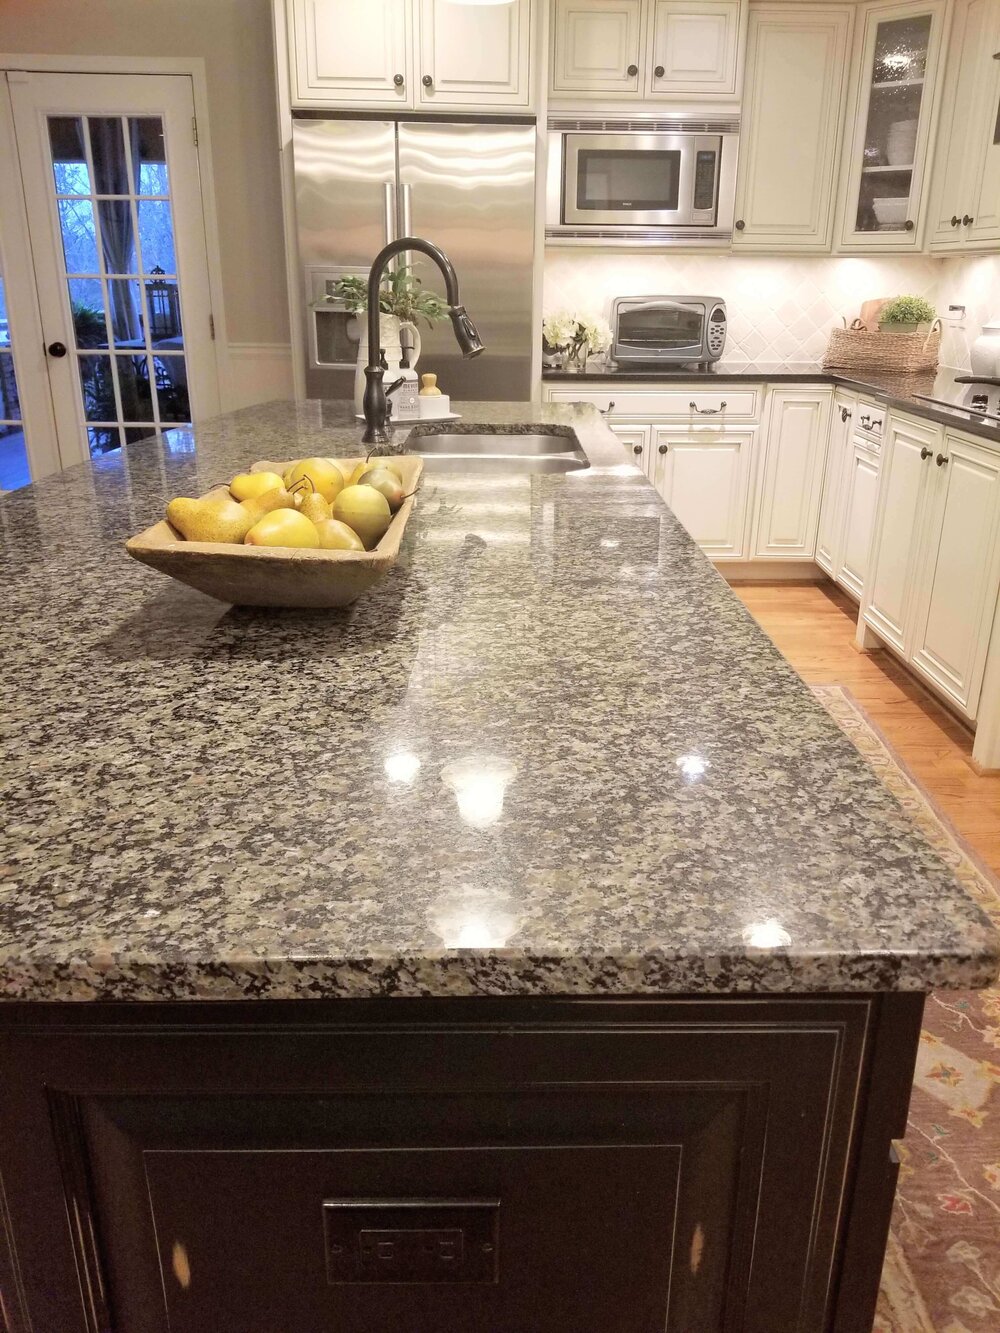
BEFORE REMODEL - Spotty granite on the island was busy and dated. Black granite is on the perimeter cabinets.
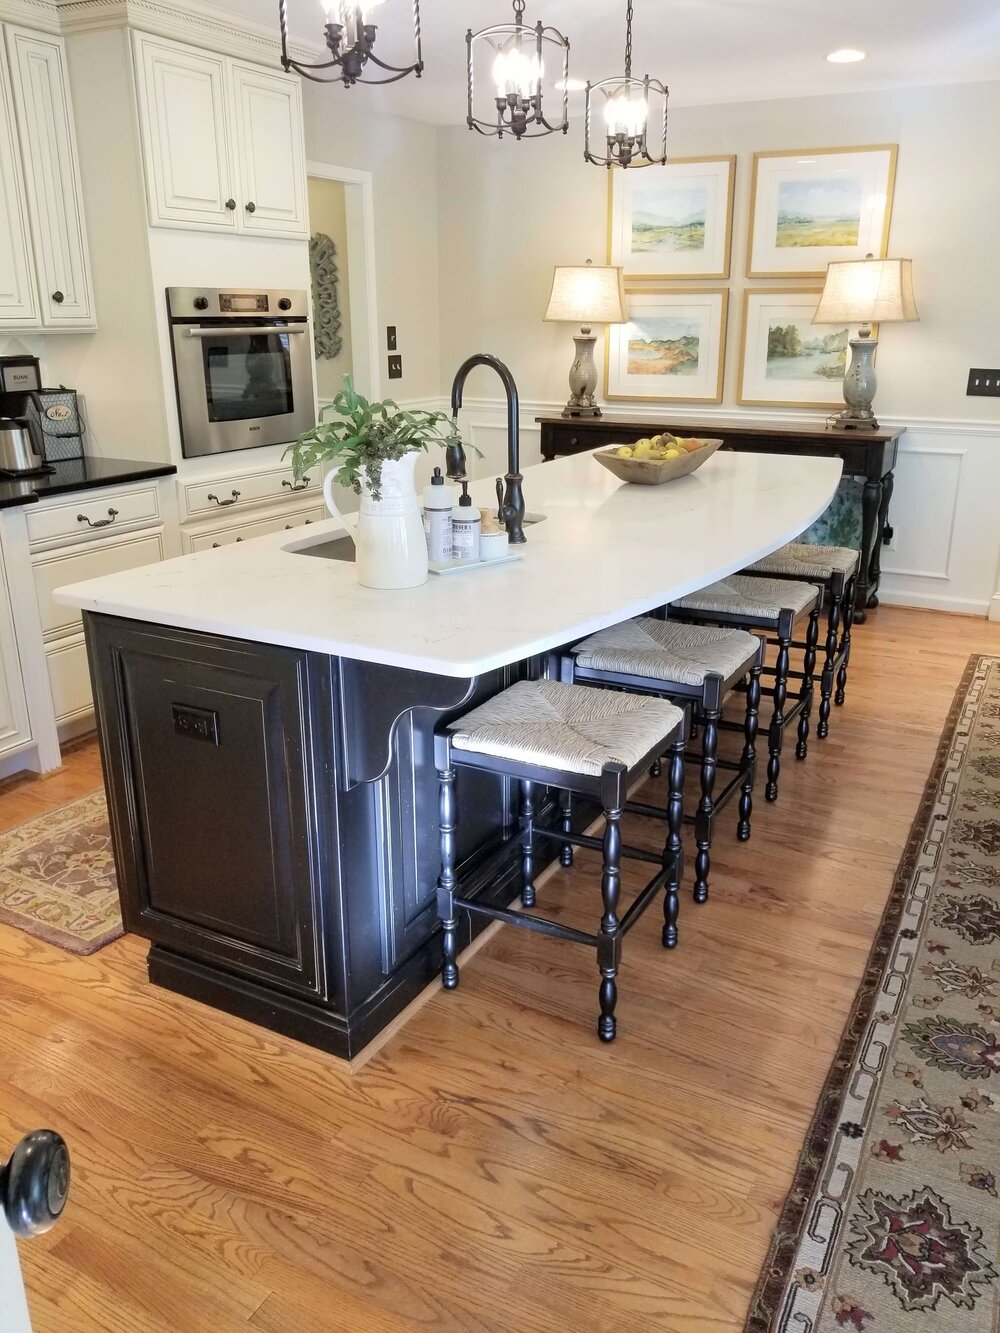
AFTER - The new quartz countertop on the island only, brightened up this kitchen and brought it up to date. The black granite remained on the perimeter cabinets.
3) Change the backsplash
You can see in some of the projects above, that the backsplash was also changed out to a simpler, cleaner style.
Because the backsplash is part of the vertical surface of the kitchen, it can often be very noticeable. It’s also, typically, not a huge expense to replace unless you’re tiling a whole wall or two. Even then, with an inexpensive subway tile or something similar, it can be very affordable, especially as compared with other expenses in construction in a kitchen remodel.
You should definitely read my post on how to deal with outlets and switches on a backsplash if you are considering a redo there.
4) Painting the cabinets
Most the kitchens above have had the cabinets painted for the most part. Many people prefer painted cabinetry these days and this can be a much less expensive investment than doing all new quality cabinetry.
Obviously, the condition of the cabinets and the overall quality makes a big difference. If you have very old, dated looking cabinets, then you might have to do even more to the cabinets than just paint them.
5) Modify Upper Cabinets If they look short
I do like my cabinets-to-the-ceiling look, as it makes a kitchen feel taller and more spacious. Even if you don’t use that extra cabinet space that much, it is nice for many reasons. One reason is to be rid of that dust-catcher ledge up there that creates a gap at the ceiling.
Dated, older cabinets tend to have short uppers. While you can get new uppers and keep your existing lowers, or remove the uppers and go with open shelving, there are modifications you can make to add height to existing cabinetry.
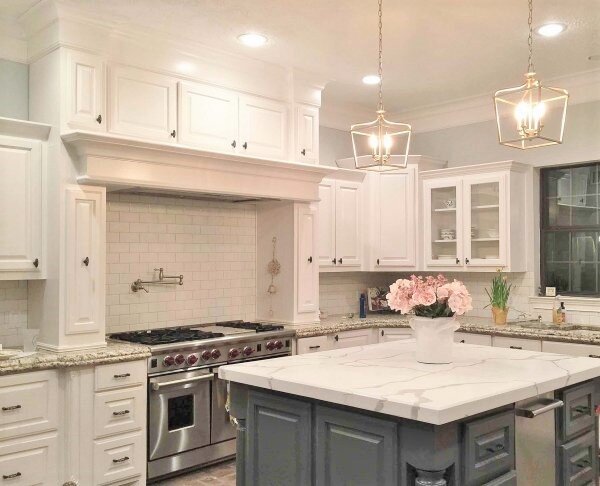
This project, below, is one of my most popular kitchen remodels on Pinterest. We added a paneled section to the top of the upper cabinets, changed out the trim and hinges, and gave this kitchen a whole new look.
BEFORE REMODEL - Kitchen cabinets were dated and had heavy mouldings. They were short of the 9’-0” high ceiling.
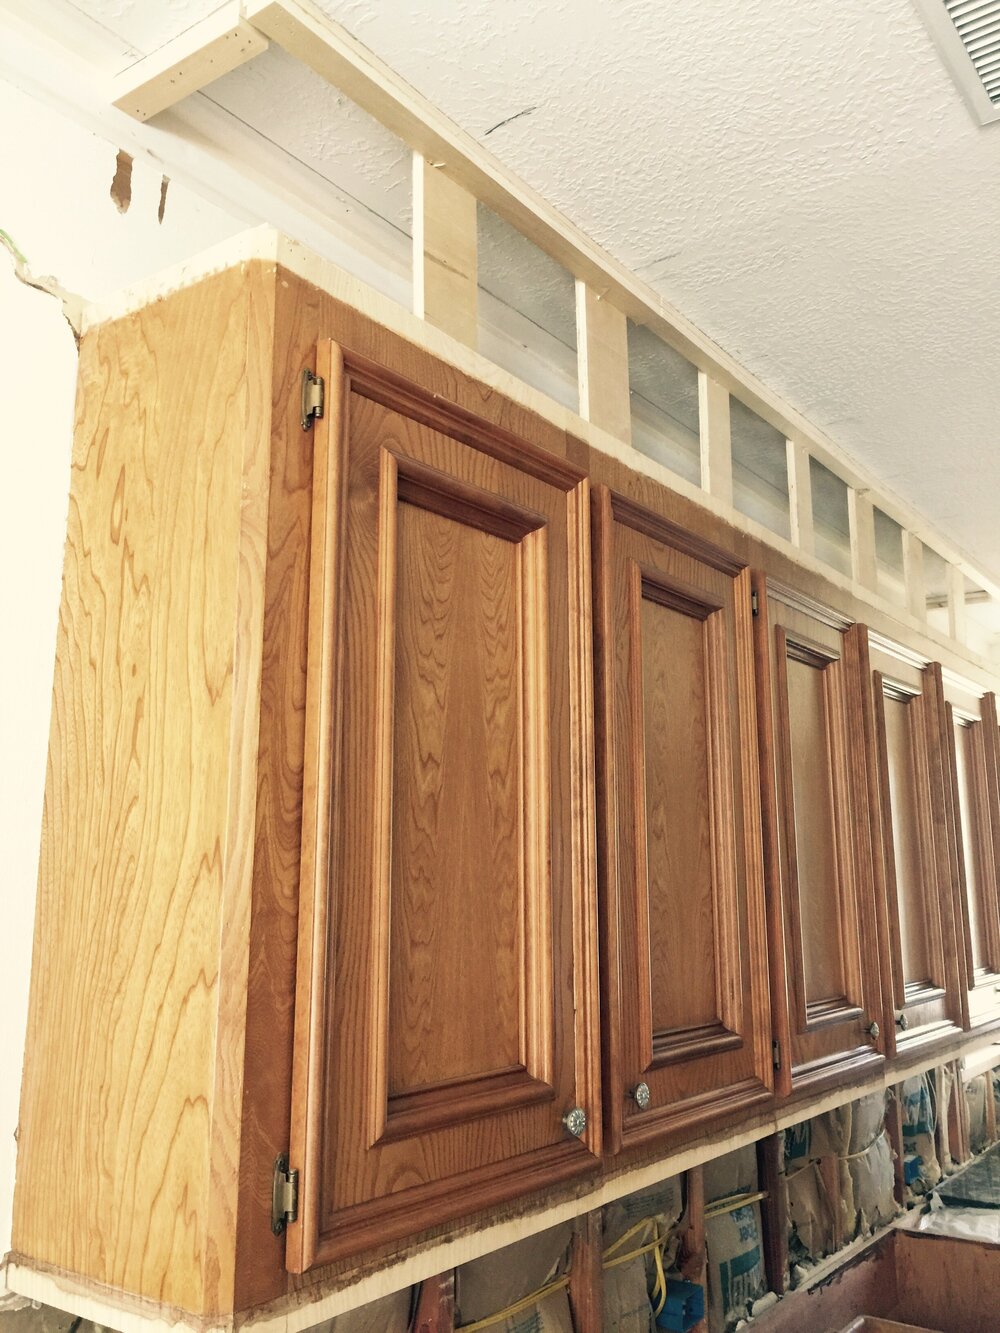
During Construction - the upper section was boxed in and new mouldings were applied to get a taller upper cabinet look.
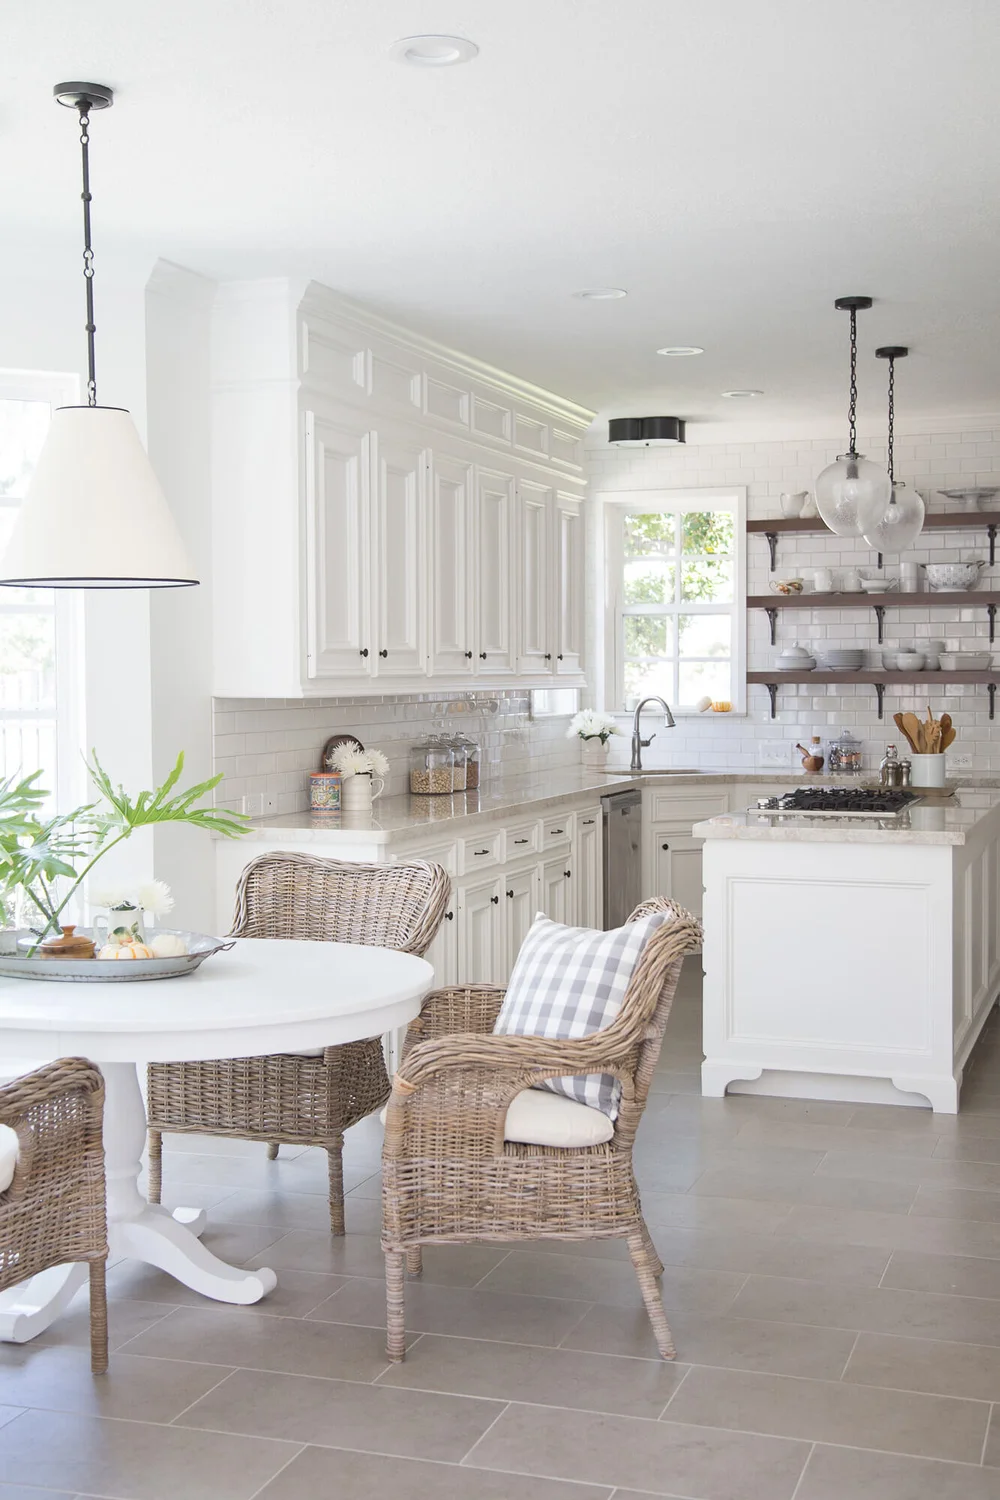
AFTER - Kitchen remodel with modified upper cabinets to the ceiling. Carla Aston, Designer | Tori Aston, Photographer
Evaluate Your Budget Then Figure Out Where To Make The Biggest Impact
Even though your project will likely end up costing you more than you anticipate, try to plan what you have to spend with a cushion for overages. Start with your top priorities and see how much you can afford to put into the project.
You can see from some of the examples above, how you can phase a project if you can’t do it all in one bigger remodel and how you could work some with what you have if you are strategic and plan it out carefully.
I have my email Q&A consultation service that can help you prioritize and decide what to keep and what to remodel, if you need some help.
And……..I’ve got some budget-minded links below that might help you tackle your own partial kitchen remodel.
Thank you! Here’s your FREE Bookshelf Styling Guide!